Showing posts with label Quickutz. Show all posts

Wednesday, March 24, 2010

Easter DT Project

Hi all! Easter is just around the corner (literally) so it's time to get a hippity hop on if you are going to give some handmade goodies. I would like to share with you two cute little Easter Gift Boxes that I have made for my Easter DT project over at My 2 Angels. The cute little boxes are decorated Chinese Takeaway Noodle boxes. These would be sooooo cute filled with chocolate as a present (or filled with buttons or little embellishments for your favourite scrapper!) for Easter.
Blue flower Easter box:
This box has some machine stitching through the middle of the paper detail. The little rabbit is a quickutz die cut. The large flower is a cuttlebug die set that both cuts and embosses and is called Build A Flower.
Embellishments: Scenic Route chipboard button, quickutz die (peek a boo bunny), cuttlebug die (build a flower)

Garden Scene Easter box:
This box has loads of die cuts using quickutz, sizzix and bosskuts dies. The grass strips are all handcut at random heights, and the eggs and grass are layered in to give the illusion of depth.
PRODUCTS USED: Paper: blue coredinations cardstock, yellow coredinations cardstock, pink coredinations cardstock, white coredinations cardstock
Ribbons: yellow ric rac, blue velvet ric rac, general scraps of ribbon from desk.
Embellishments: all die cut...(quickutz: peek a boo bunny & 4x4 tree; sizzix : fence; bosskuts: Easter Eggs) embossed with cuttlebug embossing folders: swiss dots, Victoria.
 
 
I hope these little boxes give you some Easter ideas. Thanks for stopping by...
Hugs C xx

Wednesday, March 17, 2010

100% Aussie Girls

Hey all...Hope your week has been going well - if not then I hope it ends quickly and painlessly for you. I just got my new DT package from Tracy at My 2 Angels, and it came packed with goodies (YAY!). I can't share the DT stuff just yet but there were a couple of extra goodies in there, just for me to play with. Tracy has these uber cute little embossed blue felt stars, and they went perfectly on this LO of my DD's in their aussie bikinis.... (along with some sass lass glitter alphas)


The materials used are:
Papers: bazzill cardstock, scenic route paper,quickutz star diecut.
Title: sassafras lass apple & nerdy bird glitter alphas; Kaisercraft mini alpha stickers
Embellishments: doodlebug designs boutique brads, Kaisercraft mini clear stamps - birdies, die cut bird, My 2 Angels embossed felt stars, generic blue heart charm.
Products used: tim holtz distress paint, tim holtz crackle accents, dimensional magic, glimmermist, Fiskars apron lace border punch, cuttlebug star diecut.

These Kaisercraft mini stamps are just so so cute!


I think the cooler weather has energized my mojo into action - have bits laid out on my desk ready to go for the next LO already LOL!!

Hugs and thanks for looking...C x

Monday, March 15, 2010

2 Quick Cards and a Make n Take

Hey all...again the weekend thief snuck up behind me and stole it away before I can blink!!! Not a lot of 'me' time this week - I completed a couple of DT projects which I can't share yet :(  so I thought I would post a couple of quick cards, and a make n take project I did at my LSS Scrapbooks From The Heart (SFTH)

First, the cards:

This features my new quickutz 4x4 monarch butterfly die (I sooo have a thing for butterflies!!!), quickutz curly flourish border die, and basic grey paper.

This one has a handmade flower, and hand stitching all the around the card (that was probably one of the most time consuming decisions I have ever made!!) The paper is cosmo cricket.

This is the make and take I made at SFTH. The lovely Jenae had the basic design all ready to go, using sizzix sizzlit dies and a cuttlebug embossing folder. I took it home then had a weeee little play with it, inking up some collections butterflies and adding some kindyglitz (yeah, I know, I'm a glitz addict).


And a quick kissy for my friend Wendy who has had her first LO considered for publication *mwah* well done chicky!!

Hugs from Me x

Monday, March 8, 2010

Growing Up

Gosh! Monday already!!! I demand to know who stole my weekend!
I just popped on to share with you this LO I did of my daughter's primary school graduation lunch. She was standing on the grass, under the trees, waiting patiently while all of us hover mums took a gazillion photos. This one turned out so lovely.


Papers : Crate paper - paper doll lizzie, Making Memories - cheeky emery red Flowers:  prima - cherry blossom branches, flutter vines scarletTitle and Journalling: Quickutz Heidi Swapp Handwriting, Adorn It Tiny Black letter tiles, Quickutz 2x2 circle journal die. Decorative Edging: Martha Stewart punch - iron gate.
I hope this week finds you all well, and I hope dry if you live in Melbourne!!!!
Gotta go - kids need to be taxi-ed here, there, and everywhere...
TFL Cxx

Sunday, February 7, 2010

Week 1 of School is Done..and a couple of DT Layouts to Celebrate

Well Week 1 is done - all settled -all happy (and so are we with the wonderful teachers we have) so all is right in my little world. Tracy at My2Angels has posted our Back To School projects so I can finally start revealing some of my DT layouts YAY! Here are my first two Back To School.. (soz everyone...you will have to wait for my lovey V-day ones a *little* longer...)

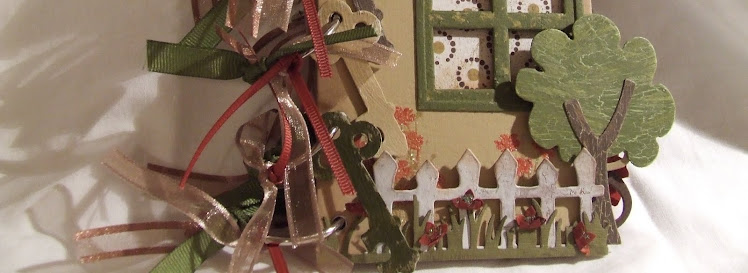
I got the idea for this after getting all the back to school items out to label and my children walked through and said 'Look at all this stuff!' and started looking at it. So what did I do? Grabbed my camera and my stepstool and took photos of course! For this page I used Pink Paislee Cupid Bullseye paper. I distressed it and lightly inked the edges. I used a piece of Cosmo Cricket Hello Sunshine Hop Scotch paper for the edging and covered the join with thick black ric rac .The house, tree and fence are die cuts using Quickutz dies and cut from thin chipboard. If you like these then Tracy has some Buzz and Bloom you can use to do this: the chipboard set it a border but hey, why not chop it up and you are left with loads of wonderful and useful chip shapes!!! I painted mine with acrylic paints then finished them off with inking and Tim Holtz crackle accents (coming in store soon - very soon!!!). I added the ABC book charm for whimsy. The title is AC Thickers Jewelry Box, and the journalling is Carolee's Creations Adorn It Tiny Black Letters. I ripped a page out of a note book, ripped it, glimmermisted it and stuck the letters on. And here's the close ups...

 
My next page was simply 2010 because it was the usual first day of school pic that we all seem to snap.

I used Cosmo Cricket papers for this one - Hello Sunshine Hop Scotch, and Get Happy Pop. I used rainbow grosgrain to hide the join. The title is from die cut numbers and Carolee's Creations Word Play stickers - tiny worn retro. The little book was really simple - a rectangle of coloured paper, 2 smaller rectangles of white paper, fold them in half and staple along the fold et voila! A book. I have a bit of a bling obsession going at the moment so I took some red rhinestones and green rhinestones, traced a circle shape, dotted where I wanted them to go then glued them on in a rainbow look. The butterfly is a chipboard butterfly that has been coated with Tim Holtz crackle paint (antique linen). These paints are so awesome and easy! The messier you paint the better the crackle, so goop it on girls! I added a lovely red scroll felt heart that I had left over from my V-day layouts and it was the perfect place to hang the ABC book charm. The large bright flowers are easy peasy handmade flowers...look HERE for the link to the Pink Paislee blog tutorial that the lovely Tracy posted. I added a bit of kindyglitz for a bit of zing.
Again...the closeups:

yibbida yibbida, that's all folks! (for now)
TFL x
C

Wednesday, January 27, 2010

I won something!!

Woo hoo! I entered my AHOY page and card into a Quickutz competition on their blog Quickutz Blog and my entry won!!! If you follow the QK blog link you will have to scroll down past the design teams valentine post (and boy, it's pretty long LOL) but there it is!! My page! I won $100 US worth of Quickutz dies. Can't wait to get scrapping with those when they arrive!!!

Later Cx
(ps.. to see my AHOY page and card either scroll down my blog or take a look at the slideshow of my recent layouts over to the right..>>>>>  )

Monday, January 25, 2010

My Gorgeous Children

Howdy! Well, I've been a busy girl - getting my layouts for My2Angels ready for February...I love how they have turned out...but you will have to be patient just a little longer to see them (sorry x). In the mean time, I've managed to squeeze in a page of my gorgeous children during the summer of 2008 (I know, 2008, but there are some photos I've just not managed to scrap yet!)


Aren't they cute...? I used Three Bugs in a Rug Playtime Stripe double sided paper, a piece of Bo Bunny Back to Basics piece that I glimmermisted. The cute little mice are scrapware chipboard mice that I inked. The hearts are sizzix primitive hearts diecuts, that I inked and/or embossed. the circle is a quickutz die 4x4 circle tag. I used a fiskars border punch - apron lace - to add a little interest to the dotted side of the paper. The word Family was a freebie chipboard word that came with a scrapping mag that I inked and coated with dimensional magic. The metal love embellishment is a making memories word tile.

Close up of details:


The embossing die I used was by quickutz in the blossom shapes set.


And...of course....the card from the leftover pieces of paper:
This has a gorgeous little robot chipboard piece by 2CRAFTY that I watercoloured, highlighted with kindyglitz crystallina then coated with inkssentials crackle accents. The happy birthday is a Creating Keepsakes birthday accent. I love this little guy!!

I hope your week (and the weather) has been good to you...Happy Australia Day!
C xxx


Monday, January 18, 2010

Take one flower hairclip.....

....and rip it apart!!! I am beginning to think I am a little nasty to my scrap bits and pieces sometimes. Anywhoo this is what I did, in fact, do. I had these beautiful photos of my daughter taken when she did an arty photo shoot. And I really wanted a kind of whimsical feel to the page....then I saw this icy blue organza flower hairclip in my hair stash (yes I have all sorts of stashes LOL) and thought....hmmmm...I have this gorgeous piece of Imaginisce paper that I haven't had the heart to use yet (too pretty to cut) and this hairclip is fabulous.... anyway..I based the layout on sketch 39 on Inspired Blueprints January sketch challenges...here is the result.


The flower detail can be a little hard to see so here is a different view:


The dragonfly is an iron on patch that I stuck onto black card then cut around - I did this to give it a little more stiffness to make the wings more 3-D. The flourish is a twiddleybitz border flourish that I inked and embossed with a pyschedelic sparkle powder. The scallop border was cut using a sizzix scallop border die out of coredinations black magic cauldron cardstock (black on the outside blue hidden inside until you distress it). The title is a combination of Adorn It lettering, and quickutz dies - Central Park and Uptown Girl.

Close up of flourish detail:


AND, of course, the omnipresent card made out of the leftovers:


The edge of the card was cut using a Martha Stewart border punch. The flourish is a quickutz flourish border die and the ostrich fibre peeking out from under the imaginisce paper was EXTREMELY fiddley and frustrating to glue in there !!!!

Thank you all so much for the lovin' and congrats on my Angel Design Team spot. *mwah*

Hugs Cx

Sunday, January 17, 2010

Ok...so I scrapped LOL....

I couldn't even wait! Had to scrap today! I discovered that acrylic paints and glimmermist dry EXTREMELY fast in 43 degree heat. REALLY fast.

So here it is....

I used coredinations vintage collection cardstock as the backing. This stuff is great as it comes looking all sanded like this. I distressed the edges a bit to give a bit more character. The gorgeous heart paper is from the Imaginisce Perfectly Post collection - fancy hearts doublesided paper. I added a twiddleybitz border bits flourish (which I painted, sanded and glimmermisted to death), a lock charm and key charm, some ric rac and ribbon. The title is an ancient piece of my stash - a metallic word from Making Memories that I attacked with paint and glimmermist. The gorgeous butterfly is die cut from quickutz REV 0166 Butterfly die. I love this die.

Close up of the poor abused twiddeybitz chipboard flourish:


And....as per the new year ressie....I did a card. I had originally cut the butterfly with a blue glittercard background, but it didn't quite work. I recycled this to make a quick card using Cristina Re paper, Adorn It letters and I embossed half the backing card with a cuttlebug embossing folder.


Off to cook burgers for dinner (ahhhh those children NEVER seem to stop EATING! LOL)
Thanks for stopping by
Hugs...Cx

Saturday, January 9, 2010

So Far So Good...

Well, so far so good... I have made the time to scrap a couple of photos that have been laying around my desk for eons - ones of my son Ben at his friend Jack's pirate birthday party. I used  a piece of Rusty Pickle Boots'n'Bones paper from the Captn Jack range, the left over half of a Collage Press 12 inch scallop circle (which was a brown colour but I altered it with Making Memories ruby glaze), a fabric iron-on patch skull, my quickutz revolution pirate ship die, a quickutz 2inch journalling circle die, quickutz waves border cookie cutter die, and a Twiddleybitz arrow from their basic arrows pack. The title - AHOY matey - was cut using my Silhouette electronic cutting machine (gosh I love this gadget!!!!).

and here is a close-up of the bottom detail:


And, true to my resolutions (so far) I also made a card from the leftovers:


AND  a quickie quickie Christmas card for the box:this card was made using a sizzix bigz XL die to cut the A5 card, cuttlebug D'Vine Swirl embossing folder, quickutz REV christmas tree die, and quickutz cookie cutter Christmas word die.


Thanks for looking take care for now. Cx

Tuesday, January 5, 2010

Happy New Year - and my scrapbook resolutions!

Whew! FINALLY I get back on here. What a hectic end to 2009 with working working and more working...Christmas Lunches and Boxing Day gatherings! But here I am... complete with a new year, a new page and a *couple* of wee scrapbooking resolutions (yeah yeah, I know, NO-ONE keeps their resolutions) that I am going to *try* very hard not to break.
  1. When I make a scrap page, make a card out of the leftovers. When we put together a page of papers and bits and bobs, we LOVE it - right? Why not make a card of the leftovers because all the colour thought has already been done!

And here's my first for the year: this is my daughters holding their little brother when we came home from hospital.


I used my quickutz silhouette electronic cutter to cut the true type font title. The papers are DCWV from the Green Stack set. I used Adorn It lettering , Prima flowers (of course!), a quickutz revolution die to cut the journalling block, and I die cut the bird using the BossKut Paisley Bird die, undercoated it in Making Memories paint then coated it in a white MM paint, then used Ranger Inkssentials Crackle Accents. I hand stitched the stitching and cheated by using a piercing bug to pre-pierce the holes so the stitches were even.


And here's a close up of the corner detail:


And - TA DAH! here is the card:

    
I used the left over papers to make the card, and I also made (and decorated) a matching envelope. I used the Quickutz Silhouette (now distributed by Silhouette America,INC. ) to cut the envelope out of a nice co-ordinating paper.

    2. TRY and make a couple of Christmas cards every month -  we all have days when the MOJO goes-o, ah.... the black hole of creativity strikes us all at some point...so why not throw together a Christmas card or two out of those little pieces of Christmas stuff you stuck into your stash ..?

Here is the evidence!!!! LOL.

I used leftover papers from the above two projects and a stray Anita's 3-D sticker (GASP! Yes! I used a sticker!!! LOL) and a piece of a Christmas rub on for the wording. I popped some bling randomly on spots to give it a little lift, et voila! Christmas card No 1 is done.

    3. Last, but not least, resolution is simple (and probably the HARDEST) - try to make more scraptime!!!

Hugs until later C x

Related Posts with Thumbnails