Showing posts with label Ranger Inkssentials. Show all posts

Sunday, February 7, 2010

Week 1 of School is Done..and a couple of DT Layouts to Celebrate

Well Week 1 is done - all settled -all happy (and so are we with the wonderful teachers we have) so all is right in my little world. Tracy at My2Angels has posted our Back To School projects so I can finally start revealing some of my DT layouts YAY! Here are my first two Back To School.. (soz everyone...you will have to wait for my lovey V-day ones a *little* longer...)

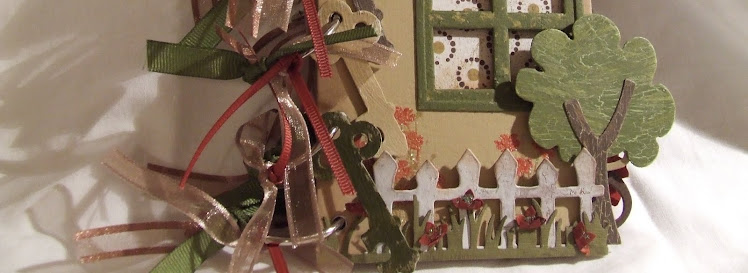
I got the idea for this after getting all the back to school items out to label and my children walked through and said 'Look at all this stuff!' and started looking at it. So what did I do? Grabbed my camera and my stepstool and took photos of course! For this page I used Pink Paislee Cupid Bullseye paper. I distressed it and lightly inked the edges. I used a piece of Cosmo Cricket Hello Sunshine Hop Scotch paper for the edging and covered the join with thick black ric rac .The house, tree and fence are die cuts using Quickutz dies and cut from thin chipboard. If you like these then Tracy has some Buzz and Bloom you can use to do this: the chipboard set it a border but hey, why not chop it up and you are left with loads of wonderful and useful chip shapes!!! I painted mine with acrylic paints then finished them off with inking and Tim Holtz crackle accents (coming in store soon - very soon!!!). I added the ABC book charm for whimsy. The title is AC Thickers Jewelry Box, and the journalling is Carolee's Creations Adorn It Tiny Black Letters. I ripped a page out of a note book, ripped it, glimmermisted it and stuck the letters on. And here's the close ups...

 
My next page was simply 2010 because it was the usual first day of school pic that we all seem to snap.

I used Cosmo Cricket papers for this one - Hello Sunshine Hop Scotch, and Get Happy Pop. I used rainbow grosgrain to hide the join. The title is from die cut numbers and Carolee's Creations Word Play stickers - tiny worn retro. The little book was really simple - a rectangle of coloured paper, 2 smaller rectangles of white paper, fold them in half and staple along the fold et voila! A book. I have a bit of a bling obsession going at the moment so I took some red rhinestones and green rhinestones, traced a circle shape, dotted where I wanted them to go then glued them on in a rainbow look. The butterfly is a chipboard butterfly that has been coated with Tim Holtz crackle paint (antique linen). These paints are so awesome and easy! The messier you paint the better the crackle, so goop it on girls! I added a lovely red scroll felt heart that I had left over from my V-day layouts and it was the perfect place to hang the ABC book charm. The large bright flowers are easy peasy handmade flowers...look HERE for the link to the Pink Paislee blog tutorial that the lovely Tracy posted. I added a bit of kindyglitz for a bit of zing.
Again...the closeups:

yibbida yibbida, that's all folks! (for now)
TFL x
C

Monday, January 25, 2010

My Gorgeous Children

Howdy! Well, I've been a busy girl - getting my layouts for My2Angels ready for February...I love how they have turned out...but you will have to be patient just a little longer to see them (sorry x). In the mean time, I've managed to squeeze in a page of my gorgeous children during the summer of 2008 (I know, 2008, but there are some photos I've just not managed to scrap yet!)


Aren't they cute...? I used Three Bugs in a Rug Playtime Stripe double sided paper, a piece of Bo Bunny Back to Basics piece that I glimmermisted. The cute little mice are scrapware chipboard mice that I inked. The hearts are sizzix primitive hearts diecuts, that I inked and/or embossed. the circle is a quickutz die 4x4 circle tag. I used a fiskars border punch - apron lace - to add a little interest to the dotted side of the paper. The word Family was a freebie chipboard word that came with a scrapping mag that I inked and coated with dimensional magic. The metal love embellishment is a making memories word tile.

Close up of details:


The embossing die I used was by quickutz in the blossom shapes set.


And...of course....the card from the leftover pieces of paper:
This has a gorgeous little robot chipboard piece by 2CRAFTY that I watercoloured, highlighted with kindyglitz crystallina then coated with inkssentials crackle accents. The happy birthday is a Creating Keepsakes birthday accent. I love this little guy!!

I hope your week (and the weather) has been good to you...Happy Australia Day!
C xxx


Tuesday, January 5, 2010

Happy New Year - and my scrapbook resolutions!

Whew! FINALLY I get back on here. What a hectic end to 2009 with working working and more working...Christmas Lunches and Boxing Day gatherings! But here I am... complete with a new year, a new page and a *couple* of wee scrapbooking resolutions (yeah yeah, I know, NO-ONE keeps their resolutions) that I am going to *try* very hard not to break.
  1. When I make a scrap page, make a card out of the leftovers. When we put together a page of papers and bits and bobs, we LOVE it - right? Why not make a card of the leftovers because all the colour thought has already been done!

And here's my first for the year: this is my daughters holding their little brother when we came home from hospital.


I used my quickutz silhouette electronic cutter to cut the true type font title. The papers are DCWV from the Green Stack set. I used Adorn It lettering , Prima flowers (of course!), a quickutz revolution die to cut the journalling block, and I die cut the bird using the BossKut Paisley Bird die, undercoated it in Making Memories paint then coated it in a white MM paint, then used Ranger Inkssentials Crackle Accents. I hand stitched the stitching and cheated by using a piercing bug to pre-pierce the holes so the stitches were even.


And here's a close up of the corner detail:


And - TA DAH! here is the card:

    
I used the left over papers to make the card, and I also made (and decorated) a matching envelope. I used the Quickutz Silhouette (now distributed by Silhouette America,INC. ) to cut the envelope out of a nice co-ordinating paper.

    2. TRY and make a couple of Christmas cards every month -  we all have days when the MOJO goes-o, ah.... the black hole of creativity strikes us all at some point...so why not throw together a Christmas card or two out of those little pieces of Christmas stuff you stuck into your stash ..?

Here is the evidence!!!! LOL.

I used leftover papers from the above two projects and a stray Anita's 3-D sticker (GASP! Yes! I used a sticker!!! LOL) and a piece of a Christmas rub on for the wording. I popped some bling randomly on spots to give it a little lift, et voila! Christmas card No 1 is done.

    3. Last, but not least, resolution is simple (and probably the HARDEST) - try to make more scraptime!!!

Hugs until later C x

Related Posts with Thumbnails