Showing posts with label Adorn It. Show all posts

Wednesday, May 26, 2010

Having Fun With Daddy

Wow! It's nearly the end of May already! This year seems to be sliding by rapidly! I have another My 2 Angels DT to share - a layout of my son and husband at AFL Auskick taken last year. They were running around like 5 year olds - both of them - and I took a whole series of shots of them mucking around. This picture represented the day well as they both have a terrific time playing around with the footy. (I can't wait to see how the balance will change when little Mr B is big enough to tackle his daddy to the ground!)
Materials Used:
*ribbons: My2Angels extreme cool ribbon, black ric rac, thin teal and black satin ribbons


The footy boot charms were perfect for this layout, and are were a very pleasant surprise when I dug them out of my parcel - they are a terrific size with excellent detail.

The Rose Moka papers that I used were dead set perfect for the photo and the club colours (teal white and black) so this page really made itself.


I have used the fantastic My2Angels Extreme Cool ribbon , ric rac, and some thin teal satin around the edge of the My2Angels frame in what I call a ribbon explosion effect. I carefully cut the ribbon so you could see the words clearly.


Ohhhh it's raining!!! Snuggle up and stay warm everyone - off to watch the last ever episode of 'Lost" (have to admit to being a little lost in the middle of the show and gave up for a while - but I promised my Hubby I would sit through it with him)....the things we do, hey girls....

Hugs C x

Friday, April 30, 2010

And my butterfly obsession continues....

I am a butterfly addict. There. I admit it. Stamps, dies, diecuts, papers, charms, embellies...I just love butterflies. So you can imagine my absolute delight at getting these GORGEOUS new Prima papers from the Flights of Fancy range. I had recently been out at Point Heathcote with my children for a modelling photo shoot, and I took my own trusty camera along too. I took this shot of the children sitting on the lawn as quickly as I could focus  (before they started giggling, poking tongues, pulling faces or doing 'bunny ears' to each other.) I developed it in sepia tones to keep in with the feel of the Prima papers. Here is my LO I did for My 2 Angels ...called They are My World...


Materials used:
*Prima Flights of Fancy papers: Miss Pretty, Firefly, Faith
*Pink Paislee holly doodle - cubicle - alphabet stickers
*Carolee's Creations Adorn It Tiny Aqua Sandra alphabet stickers

The butterflies are hand cut from a piece of Miss Pretty, coated in Tim Holtz Rock Candy, with the tips of the wings dipped in Twinklets Diamond Dust, and a little bit of crystalina kindyglitz. I continued the diamond dust/crystalina kindyglitz theme by dribbling the glitter glue along the bottom of my photo, then sprinkling with Twinklets.

The title is Pink Paislee holly doodle stickers (cubicle) that I lightly coated in kindyglitz then finised with dimensional magic.


Thank you to all of you who commented on my son's birthday cake. The 'secret' to the volcano look was to use butter based icing, dribble it down thickly, then when the candles were dotted down the cupcake tower front then lit, the butter icing warmed up and became runny - et voila! Running lava.

Hugs C x

Thursday, April 22, 2010

Relaxing...

Ahhh relaxing -NOT!!! Hear that *thump* thump* thump* sound? That's me frantically running through this week with my hair flying about in all directions! Just trying to get some direction going this week has been a challenge. So I made a big long list...so I am now up to the list point: Blog entry for My 2 Angels April DT Tutorial Project...so here it is.. (check).
Firstly, here is the page I did for the Colouring Chipboard Using Inks Tutorial (clicky here if you wish to see the tutorial). It's called Relaxing.

This Layout is one of myself and Wendy drinking some Midori cocktails that my wonderful husband made for us on Boxing Day. It was such a lovely day - warm weather and good company and great cocktails!!


The gorgeous Bo Bunny paper was just too beautiful to cut ink or tear so I left it whole and used it as a main focus. I inked the buzz and bloom chipboard piece and finished it with a touch of Rock Candy distress stickles. I couldn't resist the fabulous new Twinklets Diamond Dust so I applied glue to the bottom half of the title and dusted with twinklets.

What I used:
Papers: Bo Bunny Sophie's Notebook, Autumn Leaves Sweet Whispers
Title and Journalling: AC Thickers - Jewelry Box, Carolee's Creations Adorn It tiny black.
Embellishments: buzz and bloom chipboard - arboretum: up the garden path, doodlebug braddies jubilee butterflies
Materials: Twinklets Diamond Dust, Distress Stickles Clear Rock Candy, Versacolour inks
Tools: machine stitching, Martha Stewart border & corner punches - Loopy.

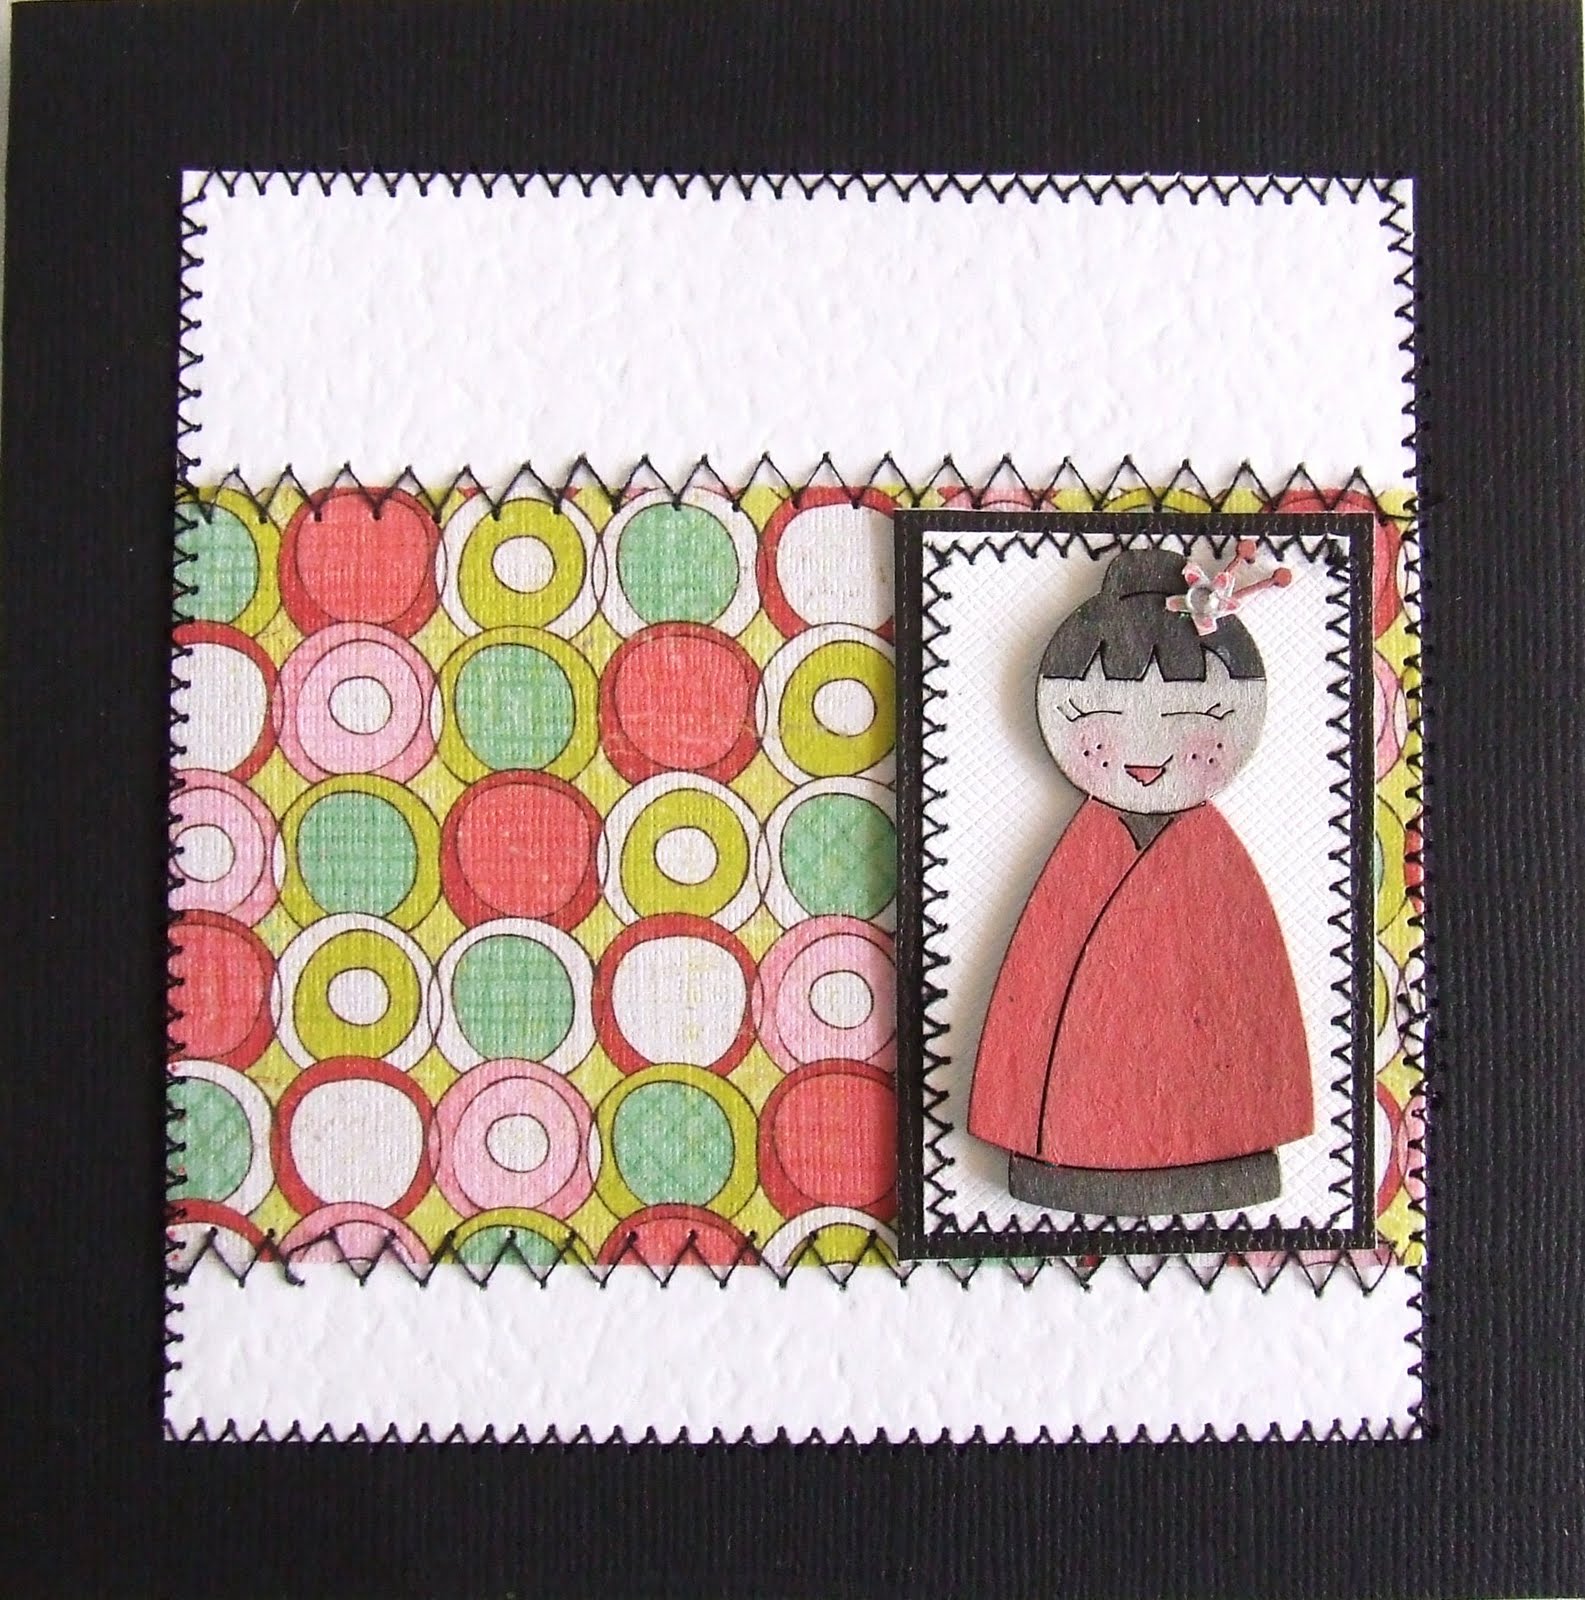
And here is a cute little card I did for the Colouring Chipboard with Watercolour Paints tutorial (clicky here to see that one...)

What I Used:
Scrapware Geisha Girls chipboard
Watercolour Pencils
Crate Paper Paper Doll Lizzie paper
Black and white Cardstock
My trusting little sewing machine.


Hope you like these tutorials! They were certainly fun doing them!

Stay tuned as I will be back in a couple of days with a sneak peek of my next card class I will be teaching in May....

AND a big HAPPY BIRTHDAY to our gorgeous little Ben.... he turns 7 tomorrow...*sigh* my baby is growing so so fast!!

Ciao Lovelies!

Hugs C x.

Wednesday, April 14, 2010

Their smiles...

Hi everyone...well, I'm back, as promised, with a DT LO for My 2 Angels to share. This one is titled 'They capture our hearts with their Smiles'...It a pic of my 2 girls dressed up for a Melbourne Cup themed modelling show. *sigh* Not looking forward to when they are going to places like the Cup for real! I must put a little note in here....green backgrounds on papers are EXTREMELY hard to photograph with any real success... I did a lot of machine stitching on this page (yes, that includes on the die cut flowers - that took ages!!) and used the new gorgeous crate papers throughout.


Materials Used:
Paper - Crate Paper.
Cardstock - Bazzill
Stamps and Ink - Maya Road, Stamp It.
Embellishments - Carolee's Creations Word Play Letter Tiles, Quickutz font (Spicy Chicken), Silhouette die cut flowers and lace, Kaisercraft rhinestones, Prima Say it With Studs butterfly and bee, buttons, embroidery floss, thread.

The weather here has turned wet (finally!!) and we are getting a wee taste of winter (at last)... so it's time to snuggle down with a warm milo and a good scrap magazine and start plotting my next shopping trip....

Hugs Cxxx

Sunday, March 21, 2010

Girls of Summer

Hi all...Now that summer has officially turned to autumn, (HEAR that -it's AUTUMN so quit with the 30+ degrees days already!!! and a bit of rain would be nice!!!! )and I thought I really should get myself into gear and sort out some of the summer beach photos I have taken of the children. The photo in this layout isn't the most artistic or skillful - I don't think it is even entirely in focus - but I really loved the colours and the feel of it. I snapped the girls on their boogie boards while they were chatting and looking out for the next big wave. It gave me a feeling of vibrant colour and youth, so I reached for the wonderfully colourful My Little Shoebox papers and this was the result...


I really wanted to keep this page feeling clean and fresh so I put down the inks, put away the paper distresser and hid the kindyglitz and sandpaper. I did a little doodling along the edges of the page though, as it looked naked to me LOL. The circular diecut is MLSB from the Imaginary Friends range. The backing page is the reverse side of a piece of Crate paper (peacock). The flowers and butterflies are handcut from a piece of MLSB All in a Flutter - Flutterbys paper. Underneath all that handcuttness (LOL) are some Prima say it in Crystals. The acetate strip is a piece of Screen Prints Vintage Plaid that has been die cut using a sizzix scallop border. The title is Carolee's Creations, and the journal box is a Kaisercraft stamp Journal Boxes.
I'll be back in a couple of days with an Easter OTP that I have done for the M2A DT so stay tuned folks!

Thanks for stopping by... Hugs C xx

Thursday, March 11, 2010

Now you are 11 - Things to do before you are 12

Hi all. Well, my middle child turned 11 recently and I have to ask - where HAS the time gone? I still see her as this little ball of energy that used to run around dressed like her favourite princess of the day!! Like all good middle children, she has her moments (or, as we prefer to call it, middle child syndrome) Our son is the youngest, and is still little and cute and the only boy, Ashlee is our eldest, a teenager, quiet, gentle and mature for her age, and is growing into a stunning young lady, and Jess slots into the middle - she's very intelligent and has a big heart and sometimes torn between being big and being small.
When Tracy over at My 2 Angels gave us free reign on the design team this month, I thought I would make good use of that and make something that was a celebration of Miss J and the things tweens can do (and still get away with doing).
It is chock full of all things bright and beautiful, just like her. I have used lashings of crackle paint and rock candy, inks, ribbons and flowers, chipboard and I have made my own word tiles using Making Memories Abby Words paper, chipboard, ink and rock candy. The butterflies are a free butterfly computer font printed onto cream cardstock, watercoloured then coated with rock candy, and the little chipboard croc head was hand cut, inked and coated with rock candy.


INGREDIENTS LIST

PAPERS: Making Memories - Cheeky Range Abby Numbers, Abby Words, Emery Red; 7Gypsies - Capri Sorento; We R Memory Keepers - Hoopla Bliss
ALPHABETS: Carolee's Creations Tiny Word Play - various colours
DIES USED: cuttlebug 2x2's 4 set Asterisks, 3 x 3 Dandelion
RIBBONS: blue velvet ric rac, red velvet ric rac, pink ric rac, cream lace, various coloured satin ribbons
PRODUCTS USED: versa inks, dimensional magic, tim holtz crackle accents, rock candy, kindy glitz, acrylic paints.
OTHER EMBELLISHMENTS: clear rhinestones
OTHER: basic grey chocolate chip album.

Thanks for making it to the end of this rather long post, and don't forget to check out the DT work on the M2A blog (Linky Linky)  xxx
Later & TFL C xx

Monday, March 8, 2010

Growing Up

Gosh! Monday already!!! I demand to know who stole my weekend!
I just popped on to share with you this LO I did of my daughter's primary school graduation lunch. She was standing on the grass, under the trees, waiting patiently while all of us hover mums took a gazillion photos. This one turned out so lovely.


Papers : Crate paper - paper doll lizzie, Making Memories - cheeky emery red Flowers:  prima - cherry blossom branches, flutter vines scarletTitle and Journalling: Quickutz Heidi Swapp Handwriting, Adorn It Tiny Black letter tiles, Quickutz 2x2 circle journal die. Decorative Edging: Martha Stewart punch - iron gate.
I hope this week finds you all well, and I hope dry if you live in Melbourne!!!!
Gotta go - kids need to be taxi-ed here, there, and everywhere...
TFL Cxx

Sunday, February 7, 2010

Week 1 of School is Done..and a couple of DT Layouts to Celebrate

Well Week 1 is done - all settled -all happy (and so are we with the wonderful teachers we have) so all is right in my little world. Tracy at My2Angels has posted our Back To School projects so I can finally start revealing some of my DT layouts YAY! Here are my first two Back To School.. (soz everyone...you will have to wait for my lovey V-day ones a *little* longer...)

I got the idea for this after getting all the back to school items out to label and my children walked through and said 'Look at all this stuff!' and started looking at it. So what did I do? Grabbed my camera and my stepstool and took photos of course! For this page I used Pink Paislee Cupid Bullseye paper. I distressed it and lightly inked the edges. I used a piece of Cosmo Cricket Hello Sunshine Hop Scotch paper for the edging and covered the join with thick black ric rac .The house, tree and fence are die cuts using Quickutz dies and cut from thin chipboard. If you like these then Tracy has some Buzz and Bloom you can use to do this: the chipboard set it a border but hey, why not chop it up and you are left with loads of wonderful and useful chip shapes!!! I painted mine with acrylic paints then finished them off with inking and Tim Holtz crackle accents (coming in store soon - very soon!!!). I added the ABC book charm for whimsy. The title is AC Thickers Jewelry Box, and the journalling is Carolee's Creations Adorn It Tiny Black Letters. I ripped a page out of a note book, ripped it, glimmermisted it and stuck the letters on. And here's the close ups...

 
My next page was simply 2010 because it was the usual first day of school pic that we all seem to snap.

I used Cosmo Cricket papers for this one - Hello Sunshine Hop Scotch, and Get Happy Pop. I used rainbow grosgrain to hide the join. The title is from die cut numbers and Carolee's Creations Word Play stickers - tiny worn retro. The little book was really simple - a rectangle of coloured paper, 2 smaller rectangles of white paper, fold them in half and staple along the fold et voila! A book. I have a bit of a bling obsession going at the moment so I took some red rhinestones and green rhinestones, traced a circle shape, dotted where I wanted them to go then glued them on in a rainbow look. The butterfly is a chipboard butterfly that has been coated with Tim Holtz crackle paint (antique linen). These paints are so awesome and easy! The messier you paint the better the crackle, so goop it on girls! I added a lovely red scroll felt heart that I had left over from my V-day layouts and it was the perfect place to hang the ABC book charm. The large bright flowers are easy peasy handmade flowers...look HERE for the link to the Pink Paislee blog tutorial that the lovely Tracy posted. I added a bit of kindyglitz for a bit of zing.
Again...the closeups:

yibbida yibbida, that's all folks! (for now)
TFL x
C

Monday, January 18, 2010

Take one flower hairclip.....

....and rip it apart!!! I am beginning to think I am a little nasty to my scrap bits and pieces sometimes. Anywhoo this is what I did, in fact, do. I had these beautiful photos of my daughter taken when she did an arty photo shoot. And I really wanted a kind of whimsical feel to the page....then I saw this icy blue organza flower hairclip in my hair stash (yes I have all sorts of stashes LOL) and thought....hmmmm...I have this gorgeous piece of Imaginisce paper that I haven't had the heart to use yet (too pretty to cut) and this hairclip is fabulous.... anyway..I based the layout on sketch 39 on Inspired Blueprints January sketch challenges...here is the result.


The flower detail can be a little hard to see so here is a different view:


The dragonfly is an iron on patch that I stuck onto black card then cut around - I did this to give it a little more stiffness to make the wings more 3-D. The flourish is a twiddleybitz border flourish that I inked and embossed with a pyschedelic sparkle powder. The scallop border was cut using a sizzix scallop border die out of coredinations black magic cauldron cardstock (black on the outside blue hidden inside until you distress it). The title is a combination of Adorn It lettering, and quickutz dies - Central Park and Uptown Girl.

Close up of flourish detail:


AND, of course, the omnipresent card made out of the leftovers:


The edge of the card was cut using a Martha Stewart border punch. The flourish is a quickutz flourish border die and the ostrich fibre peeking out from under the imaginisce paper was EXTREMELY fiddley and frustrating to glue in there !!!!

Thank you all so much for the lovin' and congrats on my Angel Design Team spot. *mwah*

Hugs Cx
Related Posts with Thumbnails